
Welcome to Survival Blocks! Are you looking to change your Minecraft version, allocate more RAM for a smoother experience, or just get more out of your launcher? You’ve come to the right place. This guide will walk you through the steps to create a new Minecraft installation, customize it, and even add a few bonus tips to make your life easier.
Let’s dive in!
Step-by-Step Guide to Creating a Custom Minecraft Installation
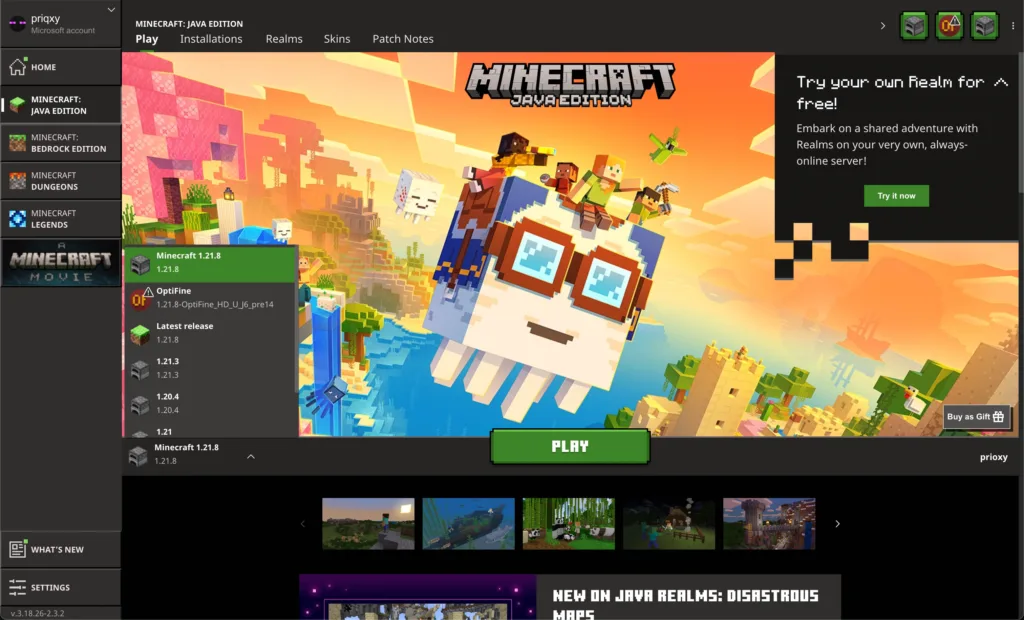
Step 1: Open Your Minecraft Launcher
First things first, open your Minecraft launcher. This is the application you use to start the game.
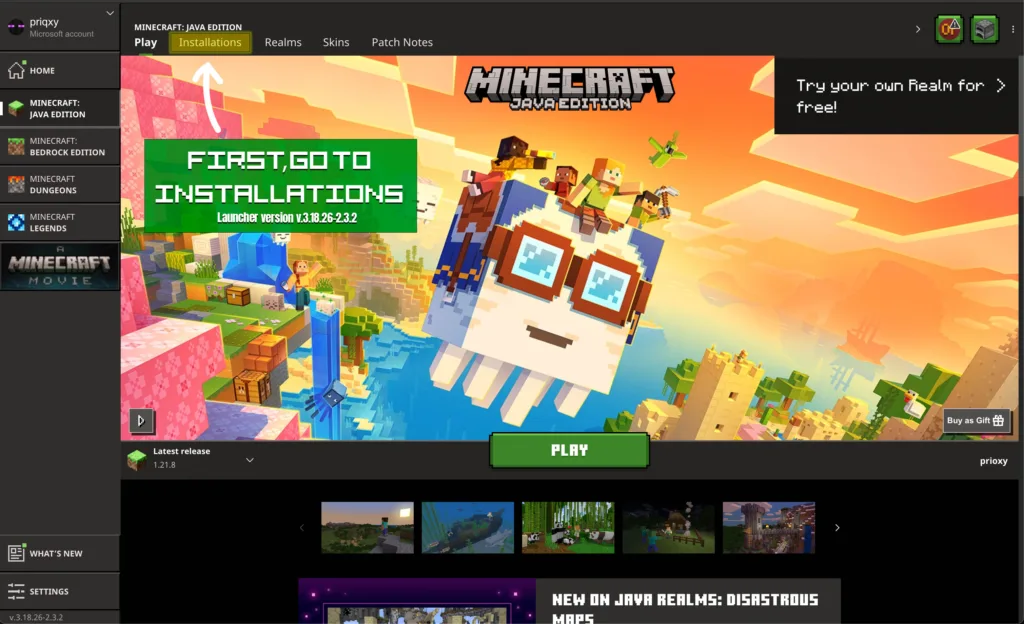
Step 2: Navigate to Installations ^
In the launcher’s main menu, click on the “Installations” tab at the top. This section shows all your current Minecraft versions and profiles.
Step 3: Create a New Installation
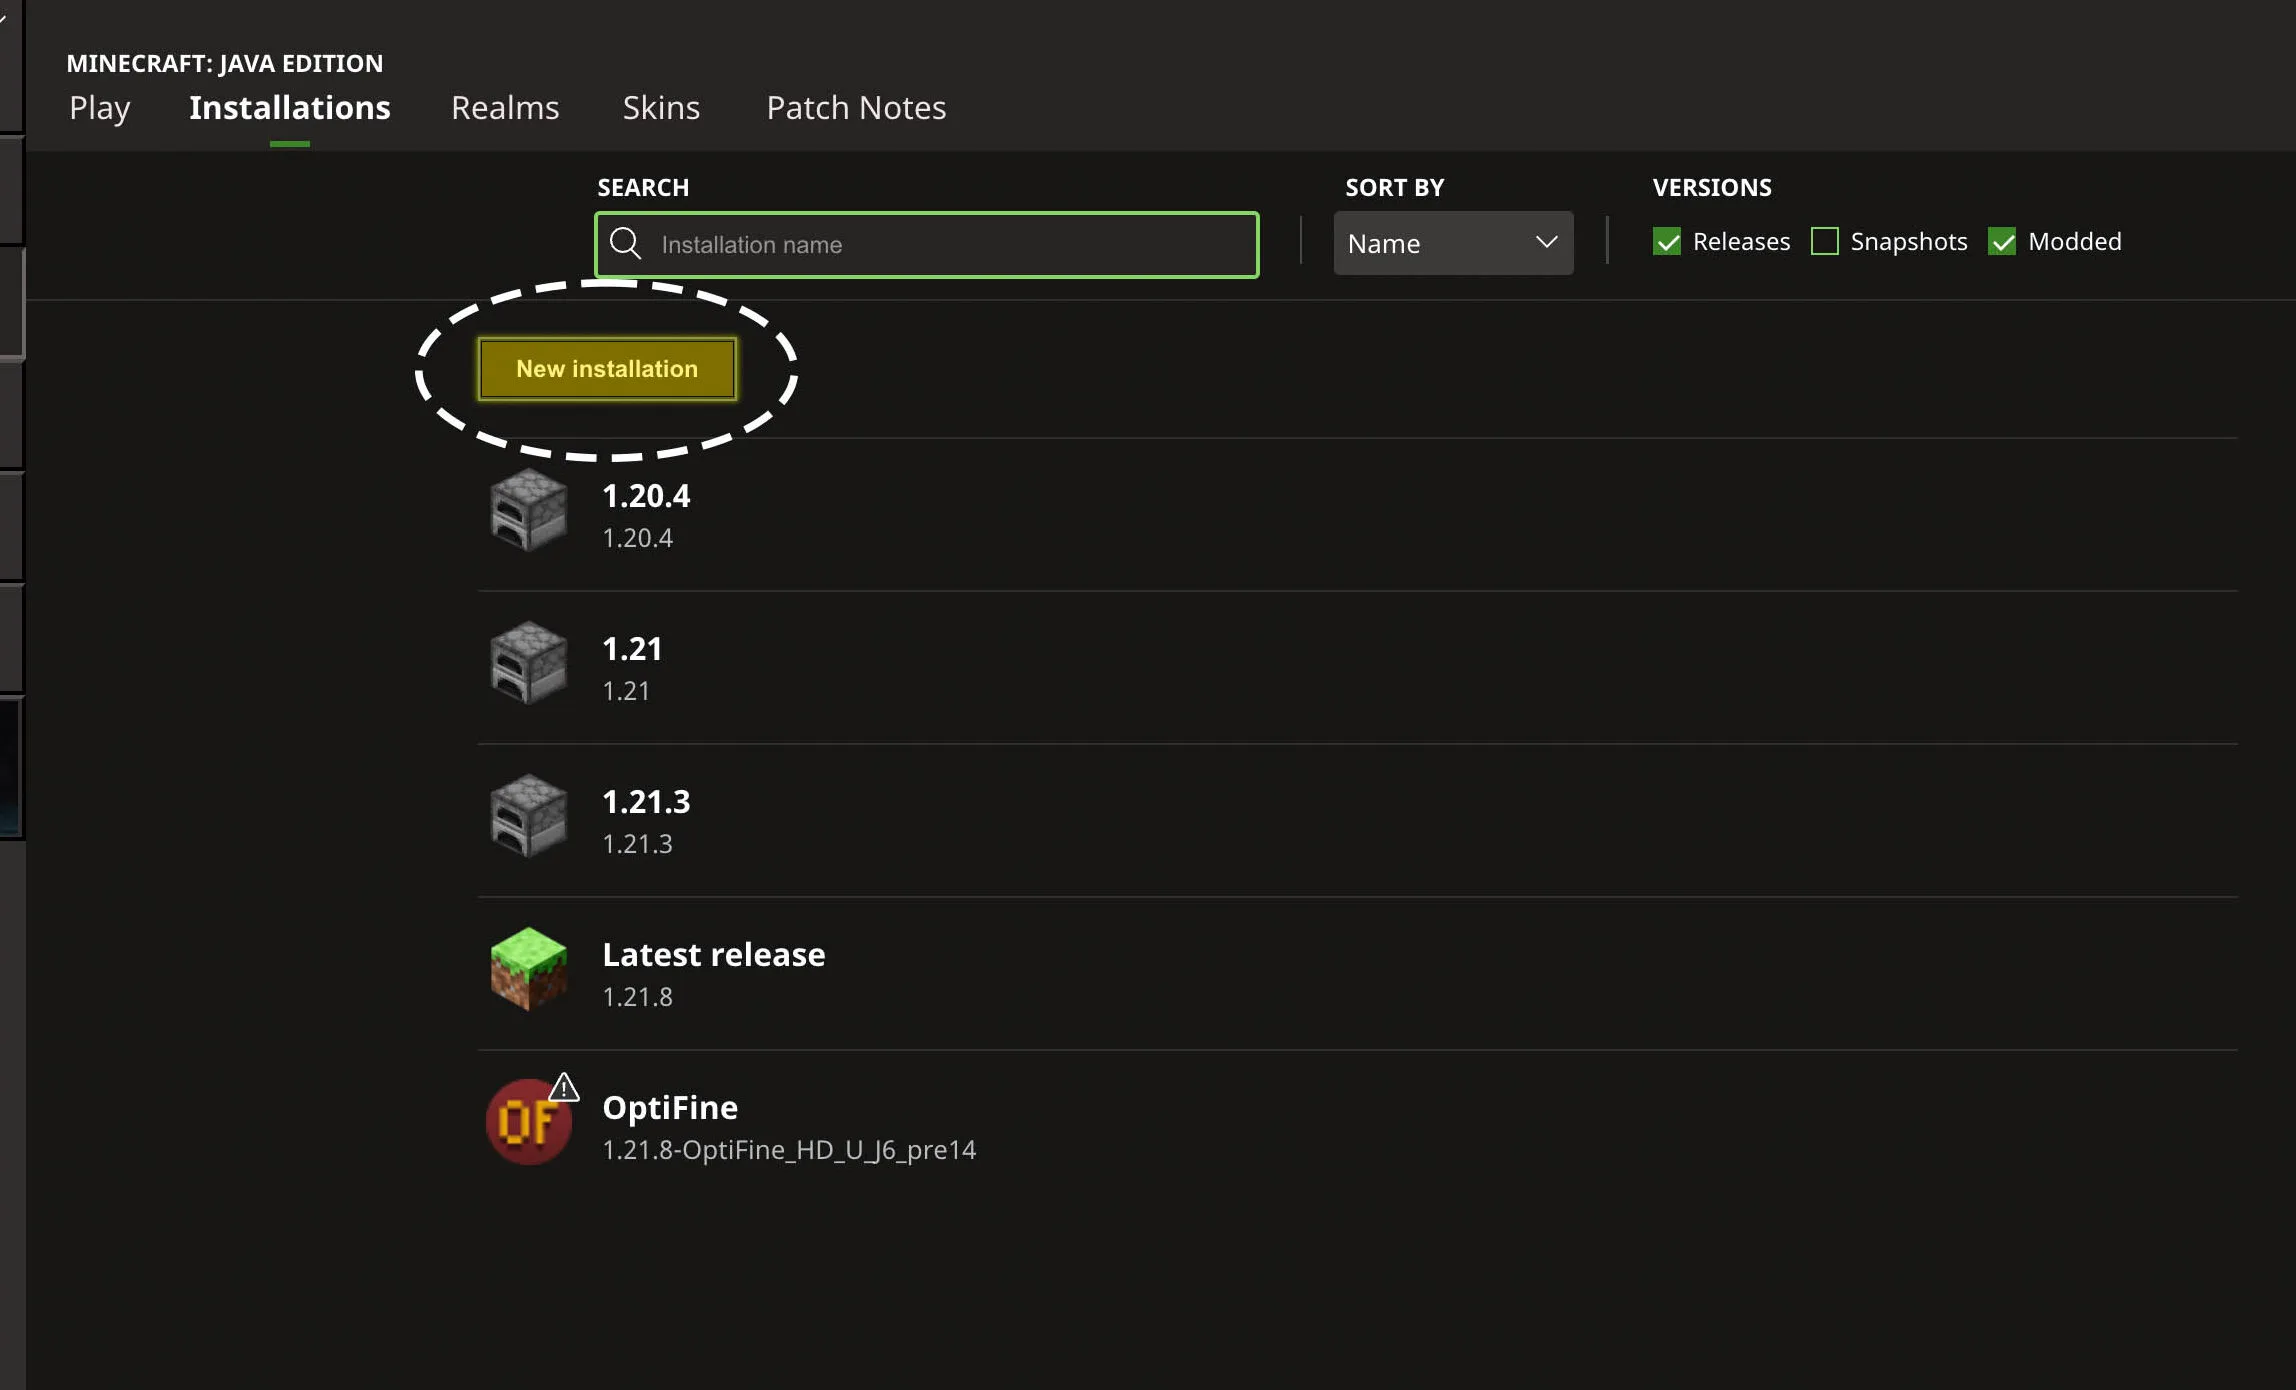
Click the “New Installation” button. This will bring up a menu where you can configure a new game version from scratch. You can also click on other existing installations to edit them instead.
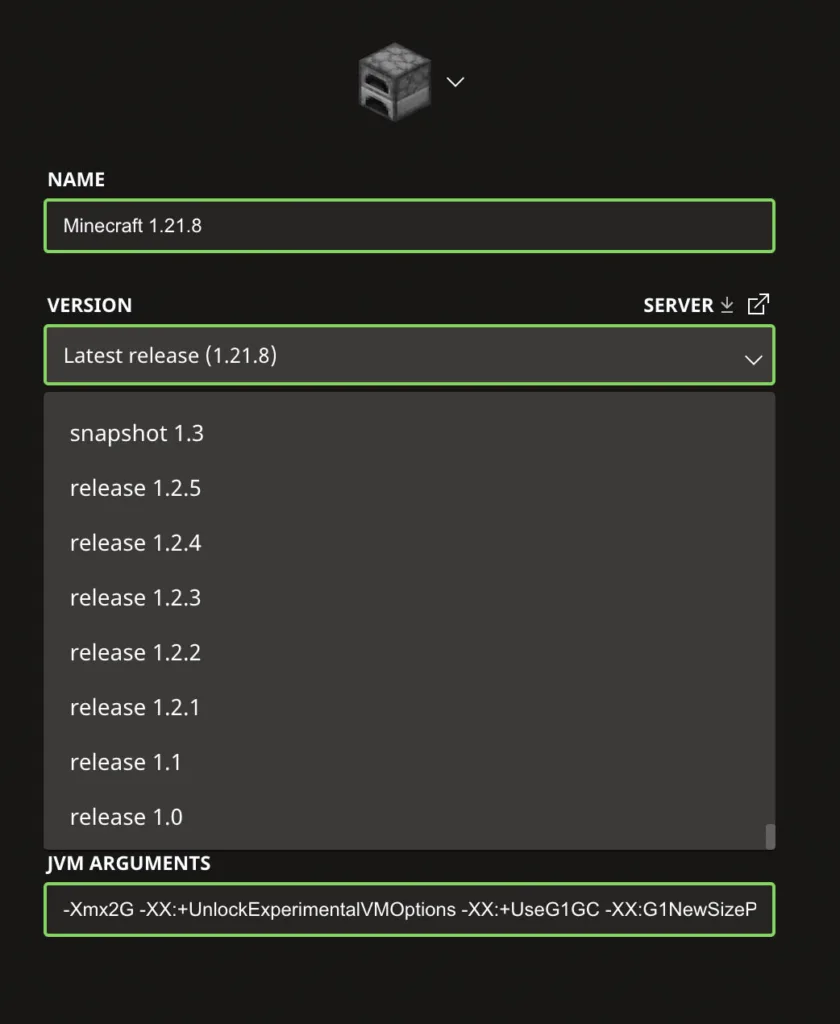
Step 4: Choose a Name and Version
Give your new installation a name that helps you remember what it’s for (e.g., “Survival 1.21.4” or “Modded Server Profile”). From the dropdown menu, select your desired Minecraft version.
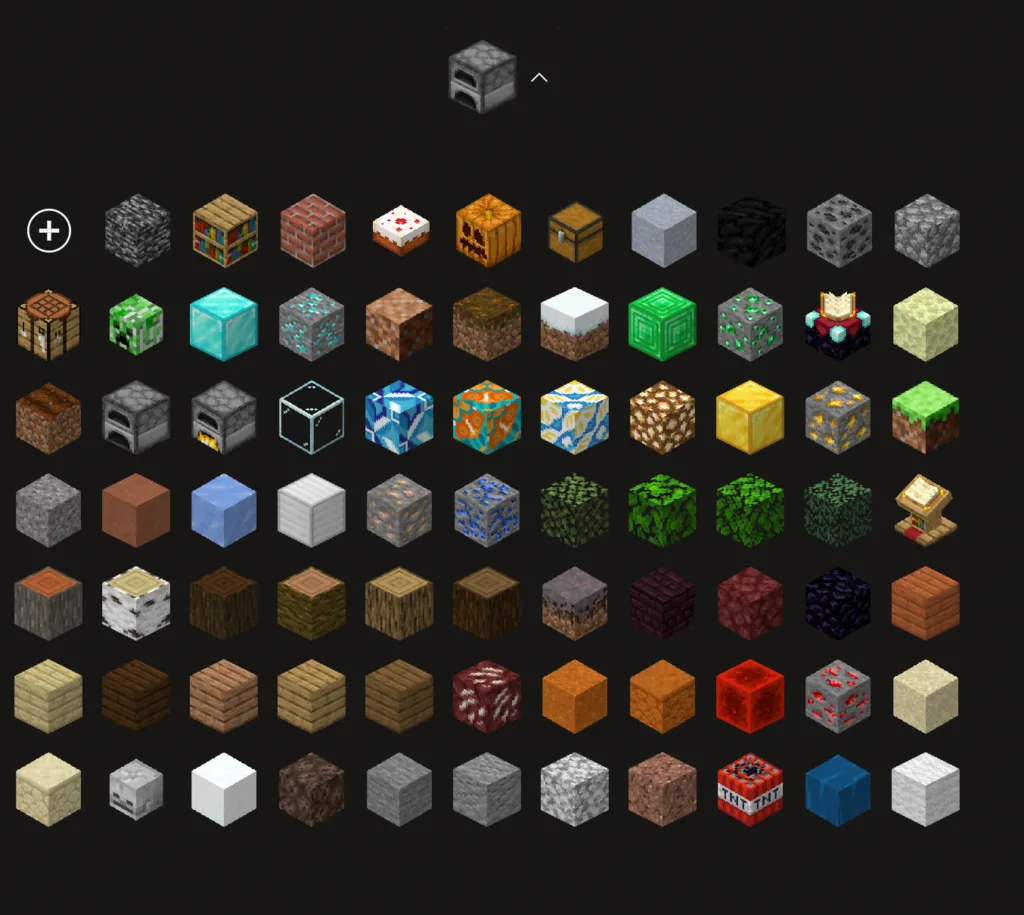
5. Choose an icon
Click on the icon to select a new one. This helps you quickly identify your installation on the list.
Step 6: Access More Options
Now, click on “More Options”. This is a crucial step for advanced customization.
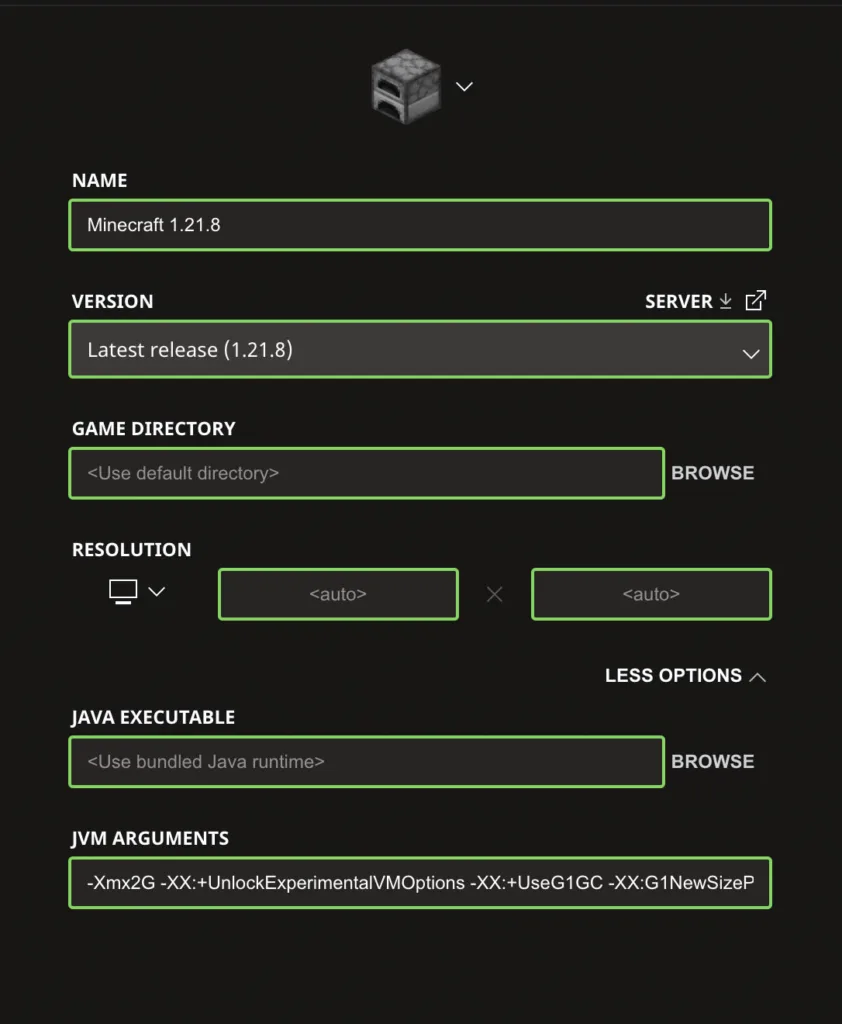
Step 7: Change Your RAM Allocation
In the “More Options” section, you can change the amount of RAM (Random Access Memory) allocated to Minecraft. By default, it’s often set to 2GB, which can be too little for modern versions or modded gameplay. Change “2G” to a higher value like “4G” or even “8G” if you have enough RAM on your computer. More RAM can prevent lag and crashes, especially when using resource packs or large worlds.
Step 8: Save and Play!
Once you’ve configured all your settings, click “Create”. Now, go back to your launcher’s homepage. In the dropdown menu on the bottom left, select the new version you just created. Finally, press the “Play” button to start the game!
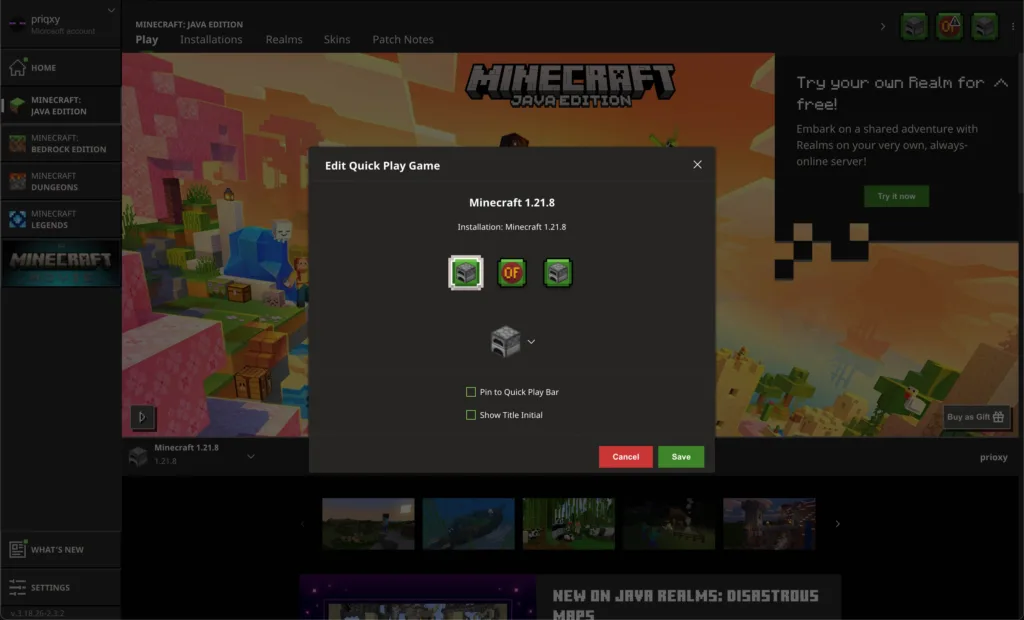
Bonus Tip: Quick Play Buttons
Did you know you can add Quick Play buttons directly to your launcher’s homepage? This allows you to launch your favorite worlds or servers with a single click.
To set this up, go to the top-right corner of the launcher and click the three dots (•••). From the menu that appears, you can configure your Quick Play buttons for quick and easy access to your worlds.
Explore our network
Every great survival story starts with a single tree, and our network is the lush forest where your adventures grow! Dive into deverse gamemodes and a vibrant community designed for every type of player, cultivating your legacy block by block.
Leave a Reply
You must be logged in to post a comment.